
Tired cabinets can make the whole kitchen feel dated, but a full replacement costs thousands. Cabinet painting offers a faster, more affordable way to refresh your space without the mess of demolition.
Planning a cabinet painting project in Durham takes more than picking a color. You need to think through timing, preparation, temporary kitchen setups, and what type of finish will hold up. This guide walks you through each decision so your project runs smoothly from start to finish.
Decide Whether to Paint or Replace Your Cabinets
Not every cabinet box is a good candidate for paint. Before you commit to the project, inspect the cabinet structure carefully.
Solid wood and wood veneer cabinets accept paint beautifully when they’re in good condition. If your doors are warped, the boxes are water damaged, or the hinges have torn out, painting won’t fix those problems. You’ll just end up with a fresh coat over structural issues.
Check the drawer glides and door hinges. Worn hardware often needs replacement during a painting project. Budget for new hinges and pulls if yours are loose, rusty, or outdated.
If your cabinets are structurally sound but just look tired, painting is usually the smart choice. You’ll spend a fraction of replacement cost and keep perfectly functional boxes out of the landfill.
Choose the Right Paint and Finish for Durability
Kitchen cabinets take more abuse than walls. You need paint and primer designed to resist grease, moisture, and repeated cleaning.
Most professional cabinet painting jobs use either acrylic-alkyd hybrids or water-based urethanes. These formulas cure hard and resist scratches better than standard wall paint. Oil-based finishes were once the standard, but modern water-based products now match their durability without the fumes or long dry times.
Finish sheen matters too. Semi-gloss and satin finishes wipe clean easily and show fewer fingerprints than flat paint. High-gloss looks striking but highlights every imperfection in the surface, so it demands flawless prep work.
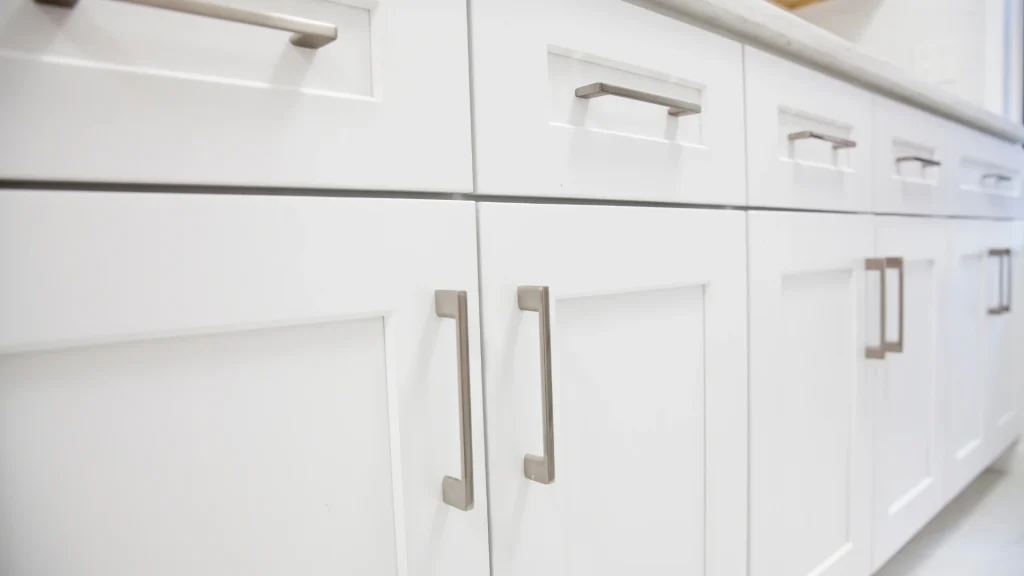
Color choice affects more than style. Lighter colors tend to show less wear over time, while very dark shades can reveal dust and water spots quickly. White and off-white remain the most popular choices because they brighten the space and pair well with most countertops and flooring.
Prepare Your Kitchen for the Cabinet Painting Project in Durham
A successful paint job starts days before the first brush touches a cabinet. Planning your space and schedule makes the whole process less disruptive.
Empty all cabinets and drawers. Sort items into boxes labeled by zone so you can find what you need while the kitchen is out of commission. Store food, dishes, and small appliances in another room or the garage.
Set up a temporary kitchen station. A folding table with a microwave, coffee maker, and toaster covers most meal needs. Keep paper plates, disposable cups, and a cooler stocked with essentials. Most cabinet painting projects take three to five days, so plan simple meals during that time.
Protect your countertops and floors. Contractors will tape and drape the work area, but moving small appliances and clearing counter clutter ahead of time speeds the prep. If you have pets, plan where they’ll stay during the work. Paint fumes are minimal with modern products, but keeping curious animals out of the workspace protects them and the fresh finish.
Remove or Mask the Things That Stay
If you’re keeping your existing hardware, label each piece with painter’s tape so it goes back in the right spot. Switching to new pulls and hinges is common during a cabinet refresh, and doing it during the paint project saves an extra round of holes and touch-ups.
Appliances built into the cabinetry need careful masking. A professional crew will protect your range hood, dishwasher front, and any paneled refrigerator sections that aren’t being painted.
Understand the Steps Your Crew Will Follow
Professional cabinet painting follows a detailed sequence. Knowing what to expect helps you understand why the project takes several days.
Crews typically remove all doors and drawer fronts and take them to a controlled workspace or shop. This allows for better ventilation, controlled temperature, and a dust-free environment. Boxes and face frames stay in place and get painted on-site.
Surface preparation is the most time-intensive step. Every surface gets cleaned with a degreaser, then lightly sanded to help the primer bond. Holes from old hardware get filled and sanded smooth. Any damaged areas need repair before primer goes on.
Primer comes next. A high-quality bonding primer seals the wood and creates a uniform base for the topcoat. After the primer dries, everything gets another light sanding to remove any raised grain or dust nibs.
Top coats go on in thin, even layers. Most projects need two or three coats for complete coverage and durability. Each coat must dry fully before the next goes on. Rushing this step leads to soft finishes that never cure properly.
Once the final coat cures, doors and drawer fronts get reinstalled. Hardware goes on last, and the crew cleans up any overspray or drips.
Plan for the Right Timeline and Conditions
Temperature and humidity affect how paint dries and cures. Durham’s climate is usually favorable for painting, but timing still matters.
Spring and fall typically offer the best conditions with moderate temperatures and lower humidity. Summer heat and high humidity can slow dry times, while winter cold can make water-based paints sluggish. If your home doesn’t have climate control in the workspace, schedule your project during mild weather.
Expect the job to take at least three full days for an average kitchen. Larger kitchens or projects that include bathroom cabinets may need a full week. Add extra time if you’re also updating your interior painting or making other changes at the same time.
Plan to stay out of the kitchen as much as possible during the work. Even though modern paints have low odor, the space needs good ventilation. Open windows and run fans to keep air moving.
Coordinate Related Updates During the Same Project
A cabinet painting project is the perfect time to tackle other kitchen improvements. Scheduling them together saves time and avoids redoing any work.
Backsplash replacement is easier when cabinet doors are off. You won’t have to work around hinges, and the tile installer has better access to the wall. If your backsplash is staying, clean it thoroughly before the cabinets get painted.
Countertop replacement also pairs well with cabinet painting. With the cabinets empty and the doors removed, installers can template and fit the new surface more easily. Just make sure the countertop install finishes before the cabinet painting starts so dust and debris don’t land on fresh paint.
Lighting upgrades brighten the new look. Swapping dated under-cabinet fluorescents for LED strips or installing new pendant lights over an island complements freshly painted cabinets.
Flooring changes require careful timing. If you’re planning new LVP flooring installation, finish that work before the cabinets get painted. You don’t want construction dust settling on curing paint.
Budget for the Whole Project, Not Just the Paint
Cabinet painting costs vary based on the size of your kitchen, the condition of your cabinets, and the finish you choose. Several factors influence the final price.
Cabinet count matters most. A small galley kitchen with twelve doors costs less than a large kitchen with thirty doors and multiple drawer fronts. The number of coats, the complexity of the color change, and the amount of prep work all affect labor time.
Hardware replacement adds to the budget. New hinges, pulls, and knobs can range from budget-friendly to high-end designer pieces. If you’re upgrading from basic knobs to handles, you may need to fill old holes and drill new ones, which adds labor.
Additional repairs increase cost. If your cabinets need wood filler for gouges, new veneer patches, or hinge plate replacements, expect to pay more. These fixes are worth the investment because they ensure a smooth, professional result.
Request a detailed estimate before work begins. A written quote should break out prep, materials, labor, and any add-ons. This protects both you and the contractor and prevents surprise charges at the end.
Frequently Asked Questions
How long does cabinet paint need to cure before I can use my kitchen?
Most modern cabinet paints dry to the touch in a few hours, but full cure takes longer. You can use your kitchen gently after 24 hours, but avoid heavy use, scrubbing, or placing heavy items on shelves for at least a week. Full hardness develops over two to four weeks depending on the product and conditions.
Can I stay in my home during a cabinet painting project in Durham?
Yes, most homeowners stay in place during the work. Modern low-VOC paints produce minimal odor, and good ventilation keeps the air comfortable. If anyone in your household is sensitive to smells or has respiratory concerns, plan to stay elsewhere for a day or two while the main coats go on.
Should I paint the inside of my cabinets?
Painting cabinet interiors is optional. It looks polished and protects the wood, but it also adds time and cost. Many homeowners choose to paint just the exterior surfaces and leave the interiors natural or simply cleaned. If your interiors are stained or have odors, painting them makes sense.
Start Your Cabinet Transformation with Acosta Building Company LLC
A well-planned cabinet painting project brings new life to your kitchen without the expense and disruption of a full remodel. When you’re ready to move forward, working with an experienced contractor ensures the job is done right.
Acosta Building Company LLC serves homeowners throughout Durham NC and the surrounding area with professional cabinet painting backed by construction expertise. Our crews handle every step from surface prep to final coat and cleanup.
Call us at 7864489355 or visit our contact page to request a free estimate. We’ll walk you through the process, answer your questions, and help you plan a project that fits your schedule and budget.